Description
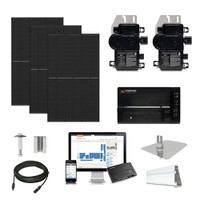
30.1kW solar kit Canadian 450 TOPcon black module CS6.1-54TM-450, Enphase hybrid microinverter, IQ combiner 6C, mounting, monitoring, accessories and permit plan. Order online or PHONE 888-498-3331
Parts / Specifications
What is included: |
Permit-ready plans, lifetime support, solar panels, inverter(s), mounting, monitoring, safety labels, accessories, manufacturer's warranty |
What is not included: |
Conduit, electrical wire, circuit breaker(s), junction boxes, sealant, concrete |
PARTS LIST: |
PARTS LIST |
Solar Panels: |
(67) Canadian solar panel model CS6.1-54TM-450 |
Inverter(s): |
(67) Enphase Energy hybrid micro-inverters model IQ8HC |
Cable: |
IQ Cables, portrait size |
Caps: |
IQ Termination caps |
Combiner: |
IQ Combiner with Envoy |
Disconnect: |
External AC safety switch disconnect box |
Monitoring: |
24/7 system monitoring |
Mounting: |
IronRidge rooftop racks, portrait layout, flush mount |
Roof Anchors: |
Choose shingle roof flash-foot, universal tile hook, or metal roof base. Other mounts available as needed; additional cost may apply |
Hardware: |
Module bonding clamps, rails splices, grounding lugs, wire clips |
Safety Labels: |
NEC code compliant site map placard and safety labels |
SYSTEM SPECIFICATIONS: |
SYSTEM SPECIFICATIONS |
Maximum Power DC (Wp): |
30,150 watts DC; 30.15 kW |
Maximum Power AC (Wp): |
27,884 watts AC CEC |
Estimated Power Generated: |
3,673 kWh AC monthly average |
Maximum Power Voltage Vmp (V): |
240 Volts |
Maximum System Output Current Imp (A): |
110 Amps |
Minimum Required OCPD Circuit Breaker Rating (A): |
140 Amps |
Array Dimensions: |
1,634 square feet |
Array Weight: |
4,256 lbs |
Distributed Load: |
2.6 lbs psf |
Design Criteria: |
CRITERIA FOR DESIGN |
ASCE Stanadard: |
7-10 |
Exposure Category: |
B - urban and suburban areas, wooded areas, or other terrain with numerous closely spaced obstructions having the size of single family dwellings or larger. |
Wind Speed Rating: |
110 mph |
Snow Load: |
20 lb psf |
Anchor Spacing: |
6ft span |
Other Designs: |
Heavy duty wind or snow version available wtih additional parts and costs |
Disclaimer: |
Product specifications are dependent on manufacturer information and are subject to change without notice. |
Installation Instructions
DOWNLOADS
![]() IronRidge ROOF mount datasheet
IronRidge ROOF mount datasheet
![]() IronRidge roof mount Installation Manual
IronRidge roof mount Installation Manual
![]() IronRidge GROUND mount datasheet
IronRidge GROUND mount datasheet
![]() IronRidge GROUND mount Installation Manual
IronRidge GROUND mount Installation Manual
![]() Enphase IQ8 micro-inverter datasheet
Enphase IQ8 micro-inverter datasheet
![]() Enphase IQ8 micro-inverter Installation Manual
Enphase IQ8 micro-inverter Installation Manual
![]() Enphase IQ Combiner Installation Manual
Enphase IQ Combiner Installation Manual
![]() Canadian TOPcon solar panel datasheet
Canadian TOPcon solar panel datasheet
![]() Canadian TOPcon solar panel installation manual
Canadian TOPcon solar panel installation manual
DIY or Full-Service Pro Solar Installation
You can choose how to install the solar panel system. You can Do-It-Yourself (DIY), hire any contractor or handyman for labor, or we can provide Full-Service Professional installation. Most customers choose DIY to save some serious money. However you decide to go solar, we will provide the permit plans, instruction manuals and lifetime technical support. You will also have the same manufacturer warranties, and be eligible for tax credits, rebates and other incentives.
Professional solar panel system installation by a state licensed contractor includes labor, wiring, electrical setup, balance of system parts, building permit, utility approval, inspection, monitoring setup, and activation. 5 year warranty on labor. Installation services are not subject to state sales tax. Final price subject to system design and site visit. Additional fees may apply for electrical panel upgrade, multiple roof areas, conduit wiring greater than 100 ft, two or more story property, or tilt mounting.
How to Install the PV Solar Electric Kit with Micro-inverters
- Read and follow the installation instruction manuals provided with the solar panel, micro-inverter, and mounting
- Secure the roof attachments to the roof rafters; add caulk as needed
- Attach mounting rails to the roof attachments using supplied hardware
- Secure the micro-inverters to the mounting rails using the supplied hardware
- Connect the AC inverter cables into desired strings as indicated in the electrical line drawing
- Connect the solar panel output cables to the micro-inverter input cables
- Secure the solar panels to the mounting rails using the supplied clamps for middle and end locations
- Connect the last PV wire to a junction box
- Connect the PV wires and a grounding wire from the junction box to the AC combiner box
- Connect the AC combiner box to a PV solar AC disconnect box
- Connect the PV solar disconnect box to a new circuit breaker in the household electrical box
- Contact the local building department or electric utility company to schedule inspection and connection to the grid for permission to operate
Tools Required to Install Rooftop Solar Mounting
- Tape measure
- Roofers bar, shingle ripper
- Chalk line
- Stud finder
- Caulking gun
- Sealant compatible with roofing materials
- Drill with 7/32" long-style bit
- Drill or impact gun with 1/4" or 5/16" deep socket
- Ladder, Safety harness and rope
- Wire stripper, cutter, crimping tool
- Conduit bender
- Voltage or Amp meter, testing tool
- Elbow grease and common sense
How to Install PV Solar Panel Roof Flashing Attachment
Simply slide the flashing under a row of roof shingles, drill pilot hole, apply sealant to hole, secure with bolt and attach sealing washer. Just a few minutes to install flash-foot. Watch this video for a demonstration.


