

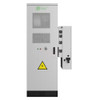
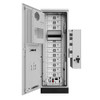
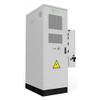
Description
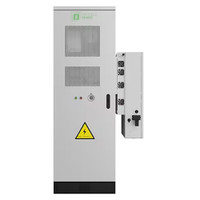
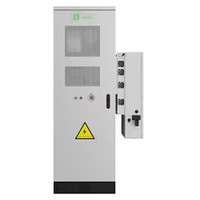
The Fortress Power eSpire Nano FP-Nano-30k-N is a 30 kW three-phase hybrid solar inverter engineered for commercial solar and battery energy storage systems operating on 480V three-phase power. Designed for commercial buildings, agricultural operations, and industrial applications, the FP-Nano-30k-N intelligently manages solar production, battery storage, generators, and the utility grid within a single energy management platform.
Built for 480 VAC, three-phase, four-wire (3P4W) electrical systems, the inverter delivers 30 kW of continuous AC output while providing seamless grid support and backup power capabilities. Its integrated APSmart rapid shutdown (RSD) transmitter eliminates the need for a separate RSD transmitter, helping reduce installation time, equipment costs, and wiring complexity. The rugged NEMA 4X outdoor-rated enclosure allows for dependable operation in demanding environmental conditions.
The FP-Nano-30k-N is designed to grow with your project. With support for parallel operation of up to six inverters, it provides a scalable solution for larger commercial solar and energy storage systems. Featuring three independent MPPTs, high-voltage PV inputs, and seamless integration with Fortress Power battery systems, the eSpire Nano delivers exceptional performance, flexibility, and long-term reliability for commercial energy applications. Backed by a 10-year warranty.
FEATURES
- Designed for 480 VAC three-phase, four-wire (3P4W) electrical systems
- Grid-supporting operation with integrated battery management
- Three independent MPPTs for flexible PV array design
- Integrated APSmart rapid shutdown (RSD) transmitter
- Outdoor-rated NEMA 4X enclosure for indoor or outdoor installation
- Parallel up to 6 inverters for scalable commercial installations
- Smart energy management for self-consumption, backup power, peak demand reduction, and load shifting
- 10-year warranty
Parts / Specifications
Manufacturer: |
Fortress Power |
Product Line: |
eSpiro Nano |
Model SKU: |
FP-Nano-30k-L |
AC (GRID SIZE): |
AC (GRID SIZE) |
Rated Input Voltage: |
208 / 220 / 240 Vac 3P4W |
Rated Current: |
72.2 A |
Max Current Passthrough: |
144.4 |
Max Discharge/Charge Current: |
72.2 A |
Rated Input Frequency: |
60 Hz |
Input Frequency Range: |
55 - 65 Hz |
Grid Power Factor: |
> 0.99 (0.8 leading ~ 0.8 lagging) |
THDI: |
≤ 3% |
INPUT - GENERATOR: |
INPUT - GENERATOR |
Max Output Power: |
26 / 27.5 / 30 kW |
Max Input Current: |
72.2 Amp |
Rated Input Voltage - Generator: |
208 / 220 / 240 Vac 3P4W |
Rated Input Frequency - Generator: |
60 Hz |
OUTPUT - AC (BACKUP): |
OUTPUT - AC (BACKUP) |
Rated Output Power - Output: |
26 / 27.5 / 30 kW |
Max Apparent Output Power: |
1.6 times of rated power with 2s |
Backup Switch Time: |
< 10ms |
Rated Output Voltage: |
208 / 220 / 240 Vac 3P4W |
Rated Frequency: |
60 Hz |
Rated Output Current: |
72.2 A |
Max Imbalance Power Per Phase: |
33% rated power |
THDv (@linear load): |
< 2% |
PV SIDE PARAMETERS: |
PV SIDE PARAMETERS |
Max. usable PV input power: |
60 kW |
Rated MPPT Voltage: |
600 V |
Maximum Input Voltage (DC): |
1000 V |
Start-up Voltage (DC): |
180 V |
Full Load MPPT Voltage Range (DC): |
500 - 850 V |
Max. input current per MPPT: |
3 x 42 A |
MPPT number / Max. input strings number: |
3/6 |
Max input power per MPPT: |
25 kW (600 V x 42 A) |
Inverter Efficiency: |
97.80% |
DC-DC Round Trip Efficiency: |
97.80% |
Max Inverter Parallel Numbers: |
6 |
Cooling and Heating Mode: |
HVAC |
Inverter Dimension (W x H x D): |
22.04 x 36.61 x 12.60 in (560 x 930 x 320 mm) |
Operation Altitude: |
8,202 ft. (2,500 m) |
Operation Temperature: |
-4°F - 122°F (derating >113°F) (-20°C - 50°C (derating >45°C)) |
Operation Humidity: |
0 - 95% |
Noise Level: |
≤ 75dB @ 3.28 ft (1 m) |
Enclosure Degree of Protection: |
IP55 (IP20 w/ indoor option) |
Anti-Corrosivity Category: |
C4 |
Fire Protection: |
BMS pre-alarm, Smoke sensor, temp. sensor, Aerosol, gas sensor & exhaust fan (optional) |
Auxiliary Power Supply: |
External power supply (208~240Vac or 480Vac VL-L) |
EMS (Optional): |
Adaptive Peak Shaving, Demand Response, VPP, Back-up, Microgrid, Off-Grid |
Communication: |
CAN, RS485-115200, Ethernet, Optional: Wi-Fi, Cellular, LAN |
Certification: |
UL1973, UL9540A, UL9540, UL1741, FCC Part 15, IEEE 1547, UN38.3 |
Warranty: |
10 years, 70% Retention with 8000 cycles |
User interface: |
HMI, Homeowner/Installer Application, Fleet Management Portal, Real-time Monitoring, |
 Fortress Power eSpiro Nano datasheet